In the wild, the turkey female begins to lay eggs in the spring stimulated by the increasing day length. Once she has laid a clutch of eggs (10-15) a natural desire to incubate them takes over and she will sit on the eggs until they hatch some 28 days later. This is known as broody behaviour, caused by a build-up of natural secretions of the hormone prolactin in the blood-stream. However, generations of selection have reduced the tendency of female turkeys to become broody. Nevertheless, without proper management, broodiness can still have a significant impact on overall egg production. This is most apparent in hot climates or where female housing, nest or management conditions are below standard.
Once a female becomes broody, she ceases to lay eggs, which is not desirable in commercial production where high egg numbers are required. Females will normally start to show signs of broodiness 3-4 weeks after the start of lay where a sudden drop in egg production after peak lay is likely to be a clear indication that a broody problem has developed.
A big factor that can promote broodiness is hot weather and performance of a female turkey can be impaired by house temperatures above 20 - 25°C so it’s important to manage the house environment well during these periods. Egg production is often improved when there is a difference of at least 10°C between day and night temperatures. Maintaining this temperature difference is particularly important in hot climates to help control broodiness.
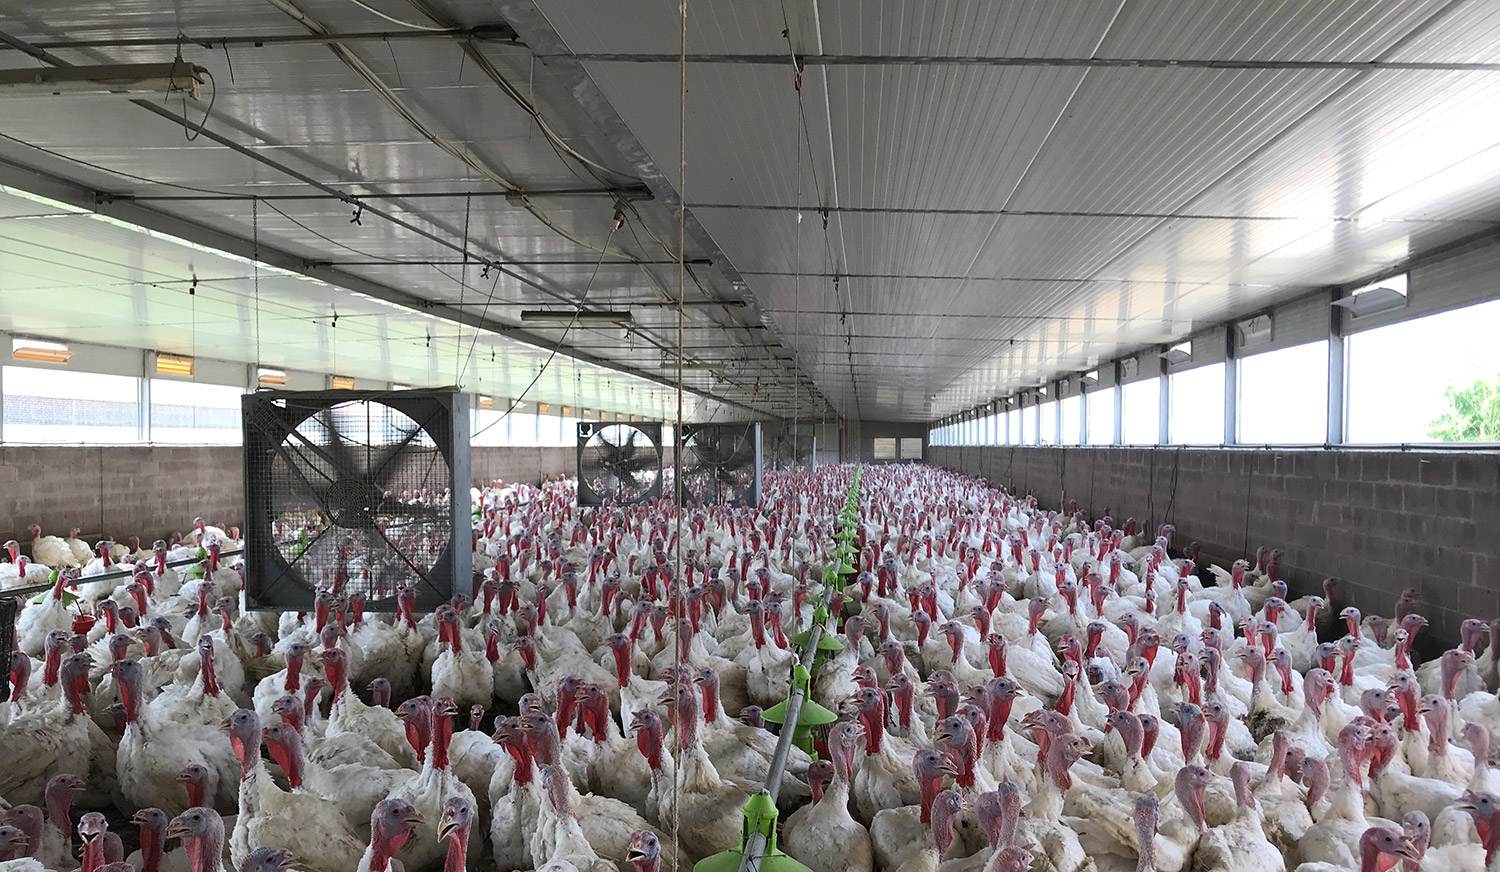 Ceiling mounted circulatory fans
A few ways to manage the internal temperature of a house is as follows:
Females should be encouraged to lay their eggs in the nest boxes. Females that lay their eggs on the floor can be more difficult to manage and encourage other hens to lay on the floor. Pens should be evenly lit and designed with as few corners and shadows as possible to discourage floor layers.
Early identification of those females going broody is essential if they are to be treated successfully and egg numbers maintained.
The important signs are:
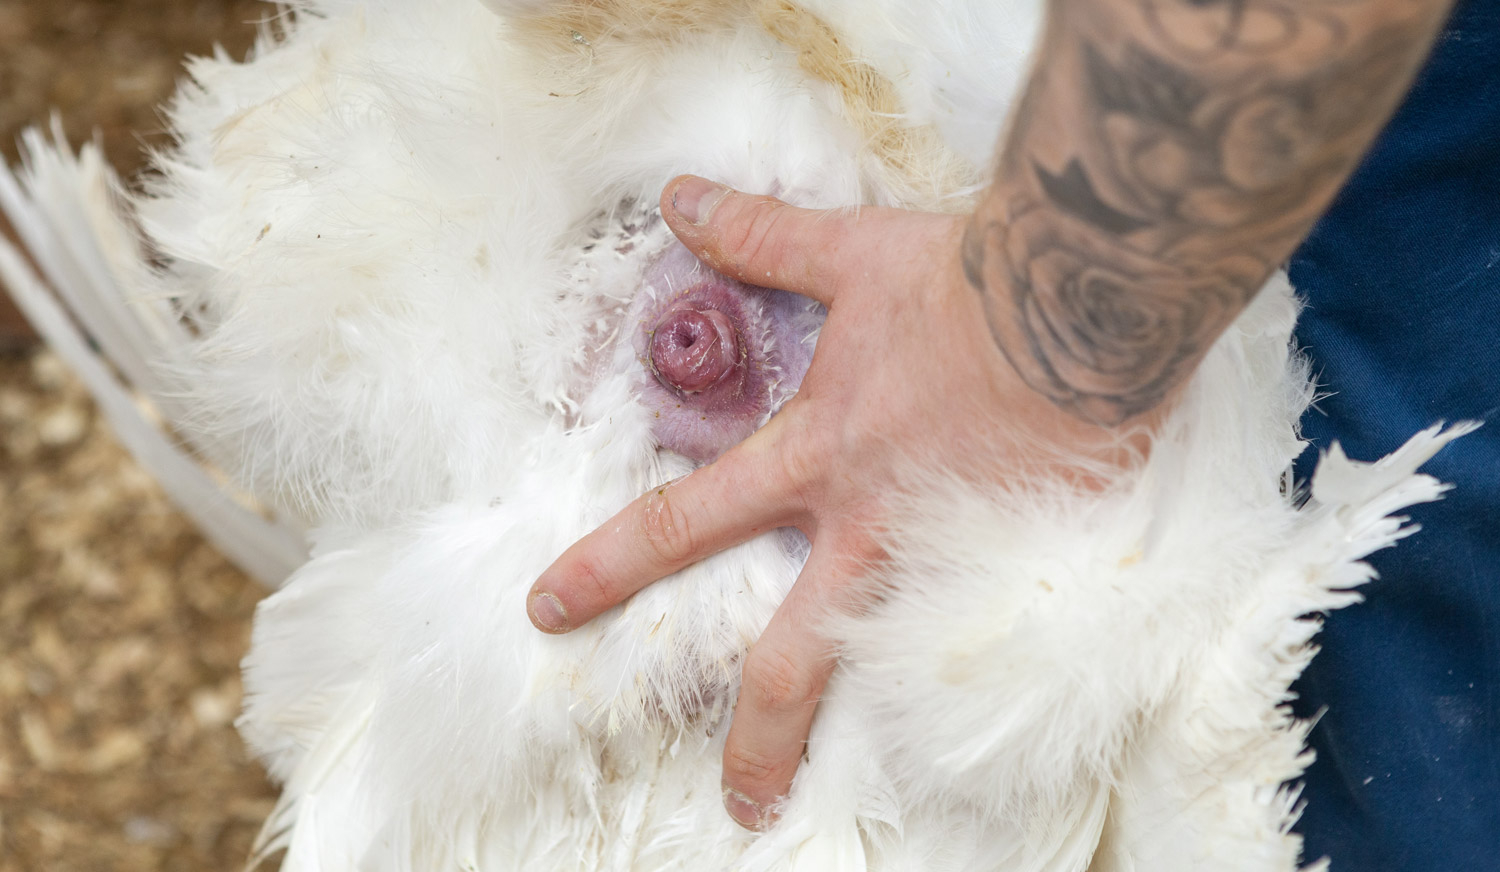 Oviduct of a non broody female in production
There are several systems that can be used to help identify broody females. The system chosen must be within the capabilities of the workforce because a system that is difficult to operate may not be done properly, or worse still, not done at all.
All females found on the nest either first thing in the morning or last thing at night (at least 20 minutes after last egg collection) should be inspected manually for broodiness. The birds can be inspected either in the nest (by palpation) or by removing it from the back of the nest so that the oviduct can be everted.
It is important to prevent the potentially broody female from escaping the nest before it can be caught and inspected, therefore, it is best to have one person in front of the nest to prevent this. With this method it is necessary to have a nest box design that allows a bird to be either removed or inspected from the back of the box. This method cannot easily be used with automatic nest boxes, although a team of two people can palpate from the front of the nest and pass the broody female to a third person in the passageway.
The main advantage of this method is that, with trained personnel, it is very accurate and does not remove too many non-broody females from the laying pen. However, a disadvantage of this method is that it does not provide early identification of non-physical broody signs and may not work as well as other systems in hot weather.
All females found on the nest, either at first egg collection in the morning, or last thing at night (at least 20 minutes after last egg collection) should be sprayed with a colour marker (see Figure 2). The following evening or morning, any birds on the nests that have the particular colour marker used the night before can be assumed to be broody. However, if nest access is restricted at night, then spraying at night will not work.
It is best to remove all marked females found on the nest as this system is based on nesting behaviour and as such gives an early indication of broodiness. Each day a different colour can be used, although the disadvantage of this is that the females can become multi-coloured, making correct identification of the colour for the day difficult. It is, therefore, important to use colours that will not persist too long, such as dilute food colourants.
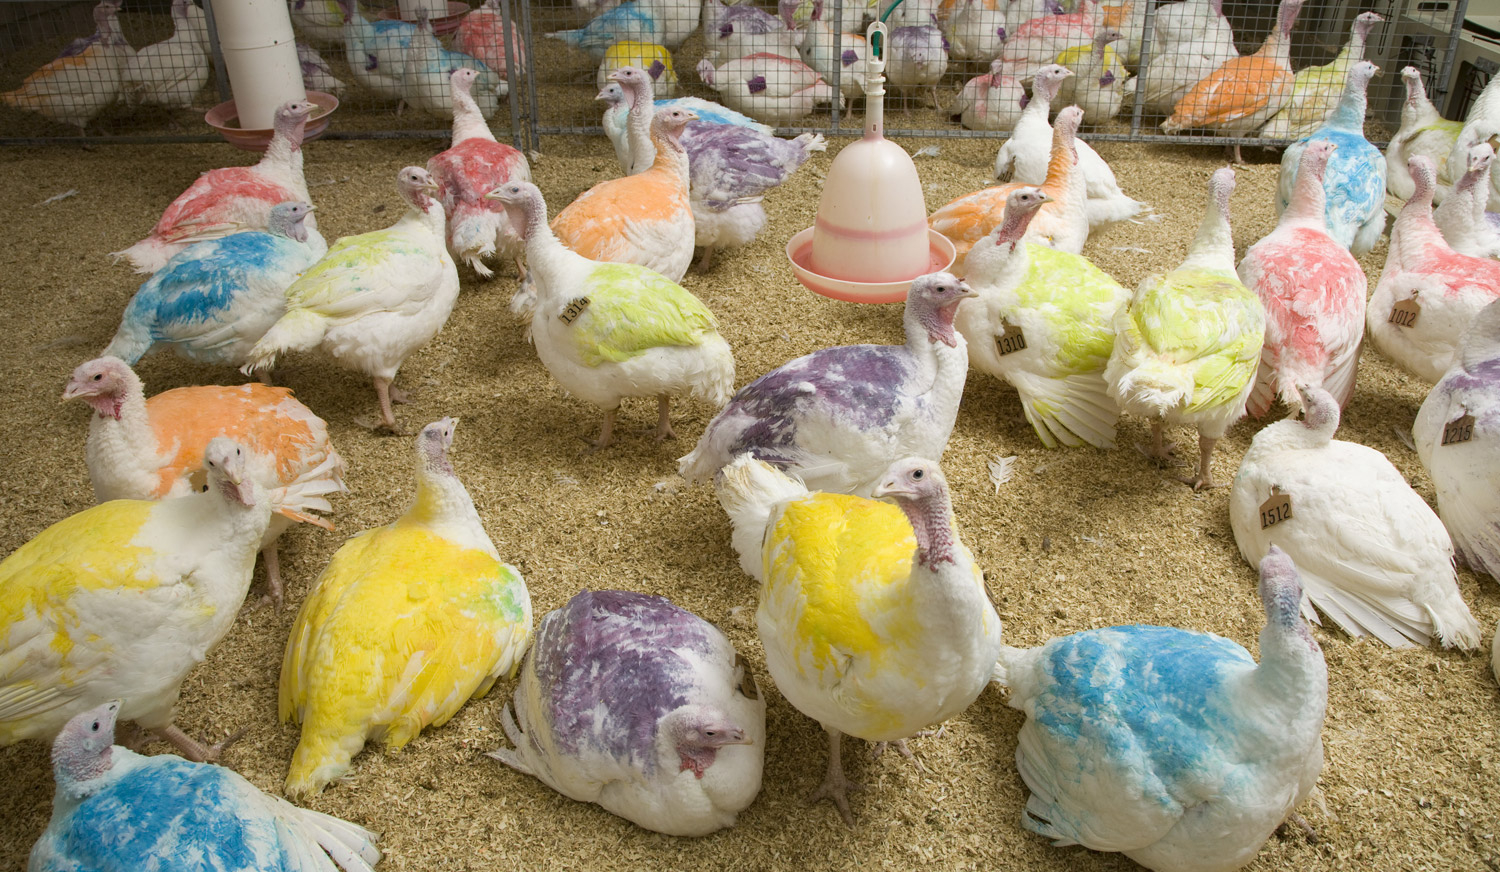 Spray marking a broody female
Having identified broody females using either one of the three methods described above, the broody females must be moved from their favoured environment (i.e., a warm, dark, comfortable nest) to a less comfortable area without a nest known as a broody pen. The broody pen usually consists of a series of pens situated in the coolest part of the laying house and preferably with a higher light intensity than the normal laying pens. Up to 10% of the house will be needed for broody pens although this should be increased to 15% in hot climates.
In larger laying houses the total broody space can be divided into two sets of pens. Each pen will ideally have a different floor or floor covering (e.g. sand, shavings, concrete, wooden slats, etc.) to the main laying pens and must be equipped with adequate feeding and drinking space, as deprivation of either will permanently stop broody females from returning back to egg production.
A four-pen system is used as illustrated below. Each pen should have easy (gated) access and be connecting so that females can be moved from one pen to another on a daily basis. Allocate 40% of the area to the first pen, as this will receive the daily collection of suspect broodies that will be rechecked later and either moved to Pen 2 or returned to the laying pens. Broody treatment is normally three to four days, after which females will normally start laying again, provided that they were identified as being broody early enough. The females in the broody pen should be inspected and handled daily and any non-broodies returned to the laying pens. Likewise, any birds seen squatting or laying an egg should also be returned.
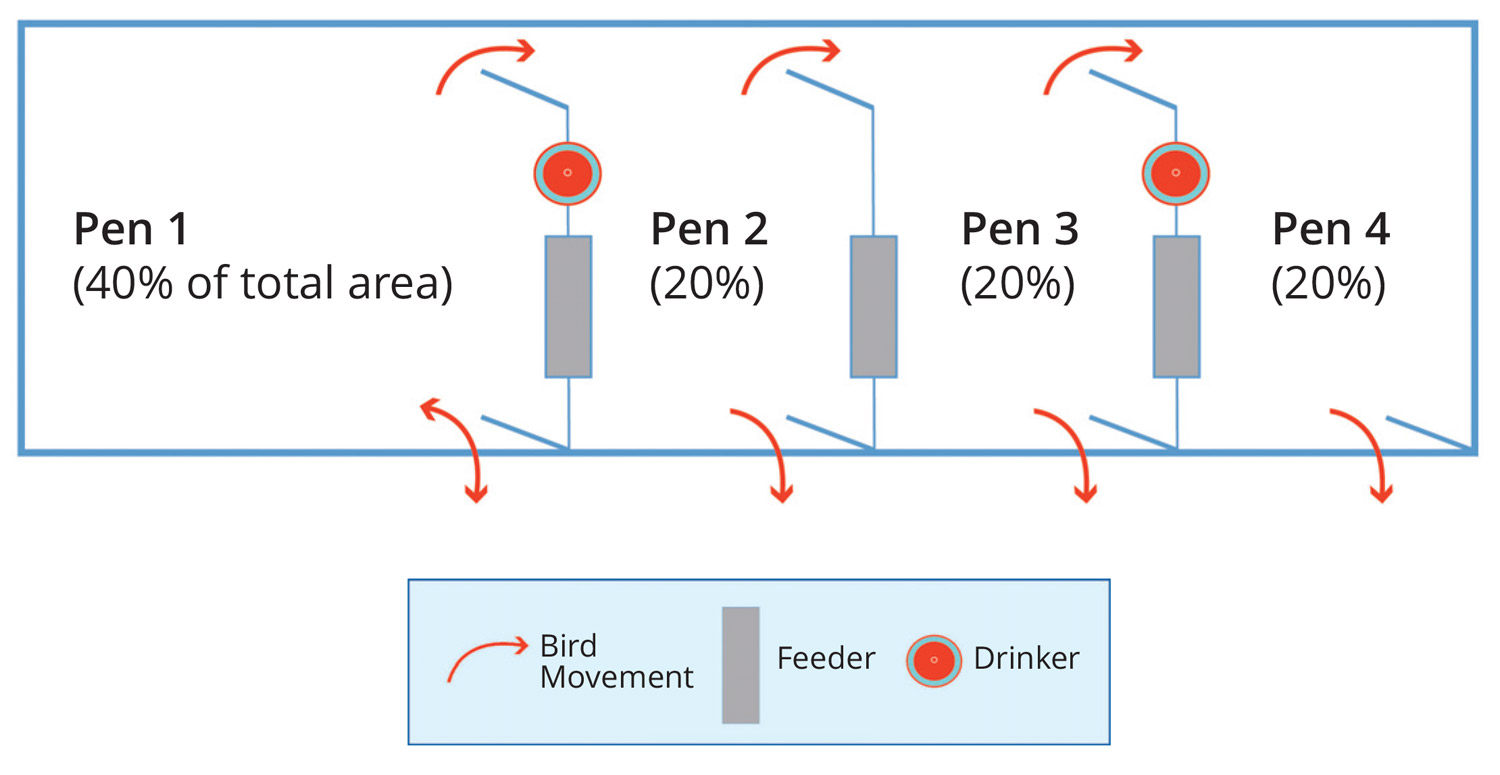
Broody pens: